Tutorial
This tutorial assumes that you have Flitter installed and that you are comfortable running it from the command-line. We’ll be building scripts as we go along and, as Flitter will live reload code, you can follow along in the editor of your choice making changes and seeing the result instantly.
Declarative Visuals
Flitter is first-and-foremost a declarative language for describing visuals. What is to be drawn is declared, or described, with the engine then being responsible for doing the work necessary to show those visuals.
Let’s start with the simplest example:
!window size=1280;720
Save this to a file, say tutorial.fl, and execute it with:
$ flitter tutorial.fl
09:09:23.036 11632:.engine.control  | SUCCESS: Loaded page 0: tutorial.fl
A 16:9 black window should open. The size=1280;720 declares that we want to
draw 1280 x 720 graphics inside this window. The window won’t necessarily
actually be 1280 x 720, Flitter will resize it as necessary to fit on
screen neatly and the OS is responsible for the pixel dimensions of the
framebuffer that backs the window. However, the size here is an important hint
for things we will put inside this window.
At this point we should probably put something inside the window. Change the code to read:
!window size=1280;720
  !canvas
You can leave Flitter running in the terminal, changes to the file will be immediately reloaded. Nothing will visually change about the window at the moment, but this new line instructs Flitter to place a drawing canvas inside the window.
The drawing canvas that we have placed inside the window will be exactly
1280 x 720 pixels in size – the canvas inherits its size from the enclosing
window size attribute. We could override this by putting a size= attribute
after !canvas.
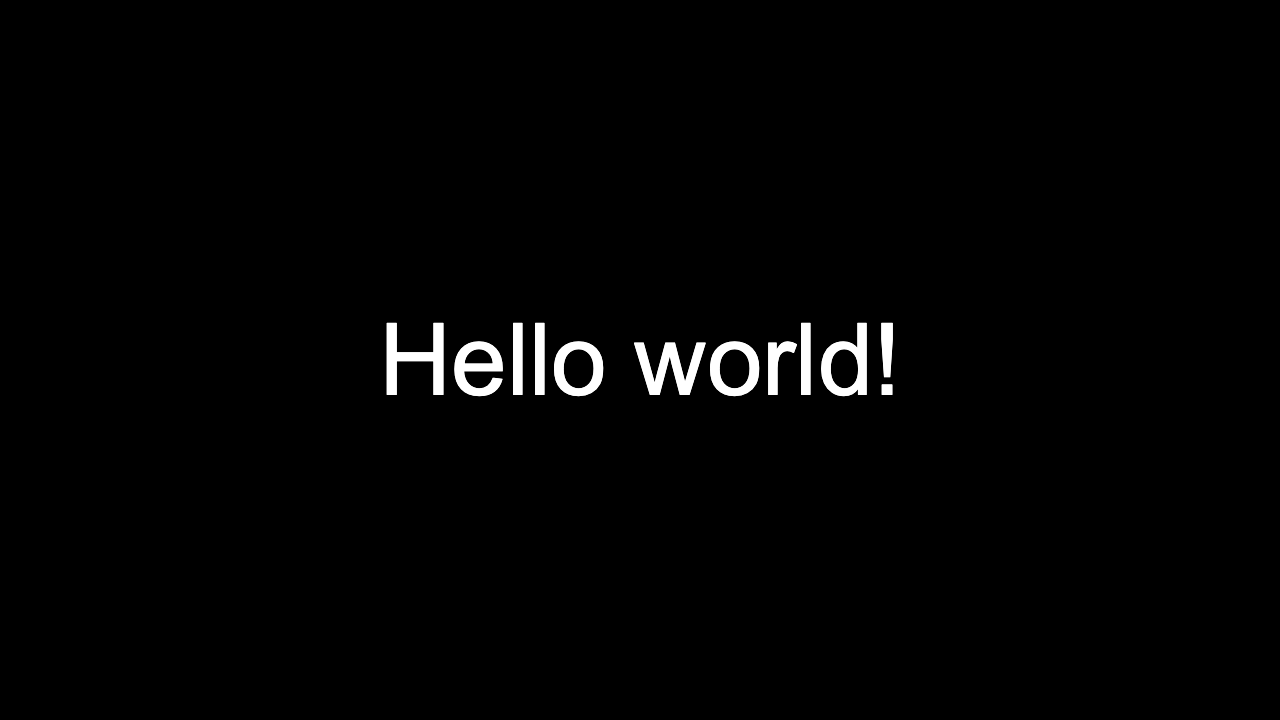
We should start actually drawing something. Change the file to read:
!window size=1280;720
  !canvas
    !text text="Hello world!" font_size=100 point=640;360 color=1
You should see the words “Hello world!” appear in white in the middle of the window.
Lets unpick what is happening here: Each line beginning ! and followed
by a name creates a node of that kind. These can be followed by any number
of name=value pairs, each of which adds an attribute to the preceding
node. Values are vectors of any combination of numbers or Unicode strings
surrounded by single or double quote characters. Semicolons ; are used to
separate multiple items in a vector. Here the size attribute of !window and
the point attribute of !text are both two-item numeric vectors. All of the
other values are single-item vectors. There are no non-vector values in
Flitter.
Nodes form a tree, with each allowed to have multiple child nodes. The
structure of this tree is created through indentation. Any number of indented
nodes given below another node will become children of that node. All children
of a specific node must be indented to the same level. Indenting in further,
as has been done with the !text node, causes a new parent/child relationship.
So the !canvas node is a child of !window and the !text node is a child
of !canvas. There is no specific rule to how many spaces you use for
indenting as long as it is consistent within a block. We’re using 2 spaces in
this tutorial to save space, 4 is probably more common. You can use hard tabs,
but it is not recommended unless your editor enforces this and never mixes
spaces into the indentation.
Names, including node kinds and attributes, may be any Unicode alphabetic character or an underscore, followed by any number of Unicode alphanumeric characters or underscores. The Flitter language itself only constructs trees of nodes and has no notion of which kinds or attributes are correct at any point in those trees. However, after a tree has been created, it is passed off to the rendering framework which then interprets the kinds, attributes and values to render some output.
In this case the renderer is doing the following:
A window with a 16:9 aspect ratio has been created. This will be kept open as long as Flitter is running and the program continues to contain the
!windownode. The window can be resized and moved around, but will retain this 16:9 aspect and cannot be manually closed. The window has a black background.Inside this window, a Skia 1280 x 720 pixel
!canvashas been created. It is initially filled with transparent pixels.The canvas renderer draws some text (
!text text="Hello world!"), in Helvetica (the default typeface family) at 100px (font_size=100), centred within the window (point=640;360), and in white (color=1).
The rendering roughly proceeds down through the tree drawing everything that needs to be drawn, and then works back up compositing the elements together. So the text is drawn inside the canvas, and then this canvas is drawn into the window.
To a degree, the Flitter tree of nodes is similar to an HTML DOM tree of elements. However, there are no text nodes as it is not a markup language. In many ways, Flitter is more similar to Scalable Vector Graphics (SVG).
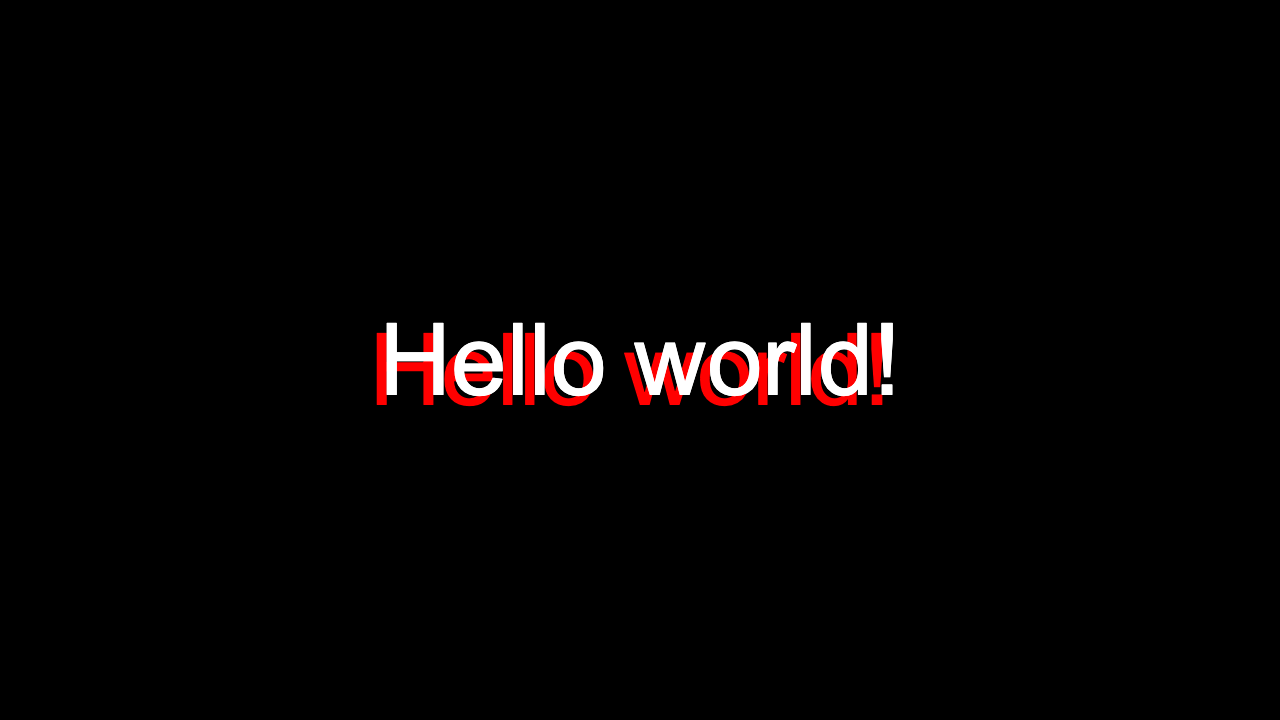
Add the following line to the code:
!window size=1280;720
  !canvas
    !text text="Hello world!" font_size=100 point=630;370 color=1;0;0
    !text text="Hello world!" font_size=100 point=640;360 color=1
You should see the window now displays the original message in white, overlaid on top of the same text in red drawn with an offset. The result is a red “shadow” to the original text. There are some immediately useful things to learn from this:
Drawing generally proceeds downwards through the file, with later elements drawn on top of earlier ones.
The drawing canvas follows the common document convention of the origin being at the top left and the y axis pointing down. So
370is lower down in the window than360and630is further left than640.Colors can be specified as either 1- or 3-item vectors. If given as a single value then the number represents a gray level from 0 to 1, if given as three values then the number represents an RGB triplet, also in the range 0 to 1.
We can pull out some of the duplicated values in these two text nodes so that the intention is more clear. Try changing the code to the following (be careful of the new indentation):
!window size=1280;720
  !canvas
    !group font_size=100 translate=640;360 color=1
      !text text="Hello world!" point=-10;10 color=1;0;0
      !text text="Hello world!"
Here we place the two !text nodes inside a !group node that abstracts out
the common font_size, changes the drawing origin with translate and sets
a default color. The first !text node overrides this default color and,
specifies a drawing point offset from this origin, 10px to the left and 10px
down. The second !text node doesn’t specify a point at all, which causes it
to be drawn at the group origin and, without a color attribute, it will be
drawn with the group color.
!group nodes alter the drawing context for the nodes that they contain. They
are able to change the local transformation matrix that establishes the drawing
coordinate system, including rotating and scaling; change the default drawing
color, and various other paint properties like line width; and set default
font properties, including font size, the typeface family and weight. We still
have to specify the actual text to be drawn at both nodes as this is individual
to each !text node.
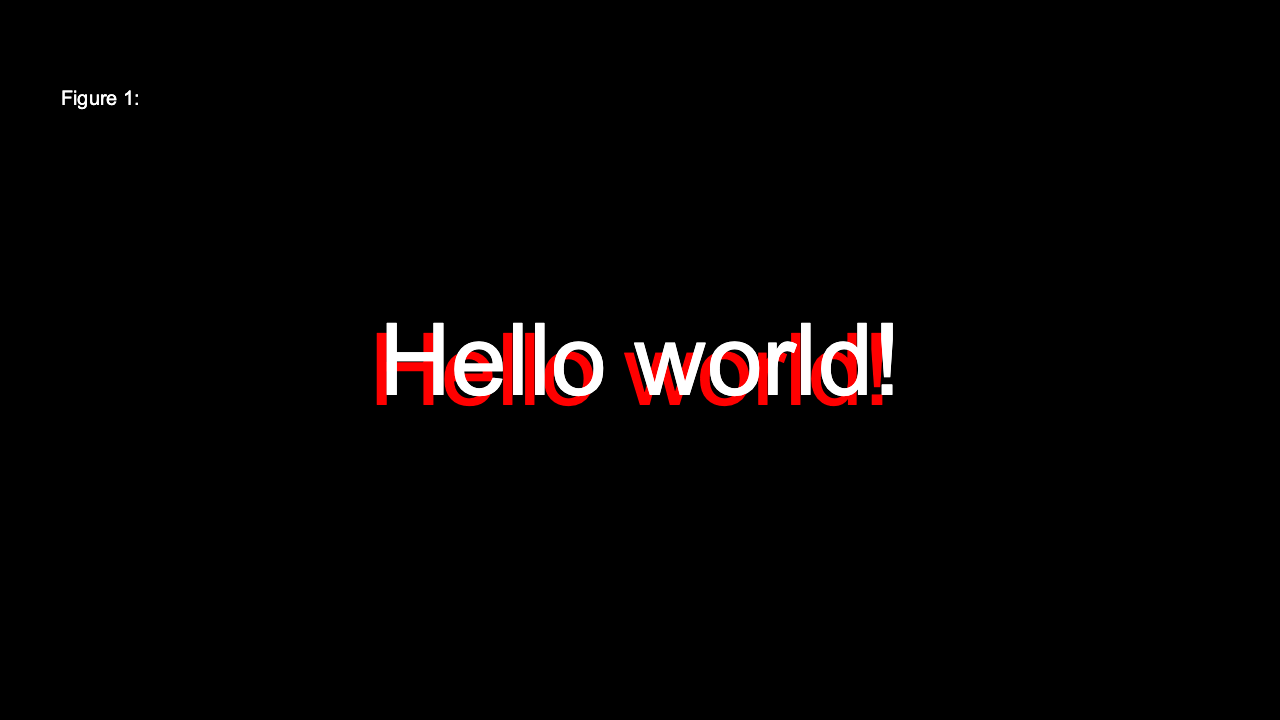
Try adding a final line to this program (again, note the indentation level):
!window size=1280;720
  !canvas
    !group font_size=100 translate=640;360 color=1
      !text text="Hello world!" point=-10;10 color=1;0;0
      !text text="Hello world!"
    !text text="Figure 1:" point=100;100 color=1
This new piece of text is drawn much smaller in the top left of the window. This
is because it has reverted to the default font size, which is just 20px, and
the default drawing origin of the top left. In fact, if we had left off the
color=1 attribute then it wouldn’t have appeared at all, as the default
drawing color is black. None of the drawing context introduced by the
!group node is retained outside of it.
An important lesson to learn from this tiny example is that both block structure (this is in that) and context (like origin and paint color) are managed through indentation in Flitter. There are no braces or close tags, and no need to explicitly save and restore context.
Named Values
So far, the code we’ve written looks more like configuration data than a program. Let’s try using some of the features we would normally associate with a programming language.
The concept of named values is common across programming, usually in the form of variables. Flitter has no variables as it is a pure functional programming language. However, we can still give names to values. This has benefits in readability and in sharing common calculations.
We introduce names into programs with let
expressions:
let SIZE=1280;720

!window size=SIZE
  !canvas
    !group font_size=100 translate=SIZE/2 color=1
      !text text="Hello world!" point=-10;10 color=1;0;0
      !text text="Hello world!"
    !text text="Figure 1:" point=100;100 color=1
A let expression declares a new name, bound to a value, that is available for
the remainder of the current block scope. In this case, we have introduced the
let at the top of the outermost scope, so this name will be available anywhere
inside the program. We use this new SIZE name to set the size of the window,
and also to calculate the middle of the canvas when we move the origin in the
group.
The calculation of SIZE/2 divides both items of the SIZE vector by 2 at
the same time, giving us 640;360 as the resulting value for the translate
attribute. All mathematical operators and functions in Flitter operate on
entire vectors at once. Generally, when one vector is smaller than another the
items of the smaller vector are repeated as necessary to complete the
calculation. So, here, SIZE/2 is equivalent to (1280;720)/(2;2) and the
division proceeds piecewise.
Functions
We could abstract out the text "Hello world!" into a name to avoid using it
twice, but let’s introduce a function to
abstract out the repeated !text nodes as well.
let SIZE=1280;720

func text3d(text, offset, shadow_color)
  !text text=text point=-offset;offset color=shadow_color
  !text text=text

!window size=SIZE
  !canvas
    !group font_size=100 translate=SIZE/2 color=1
      text3d("Hello world!", 10, 1;0;0)
    !text text="Figure 1:" point=100;100 color=1
We introduce a new function with func. This is followed by the name of the
new function and its parameters. The body of the function is simply a sequence
of indented expressions below it. We call the function in the familiar way.
But what is actually happening here? The function call evaluates to two !text
nodes. These are composed into a 2-item vector and this is the return value
of the function. At the point that we call it, that 2-element vector becomes
the value being appended to the enclosing !group node.
In fact, wherever multiple expressions are given on sequential lines, they
represent a sequence that is implicitly composed
together into a single vector, and whenever we indent one expression from
another we introduce an implicit append operator. Even our original simple
program consisted of a series of node expressions, vector compositions and node
append operations. In fact, each attribute set – such as size= – is another
implicit binary operator, taking a node on the left side and an attribute value
on the right. So there was a great deal more execution happening in our
original code than it appeared.
For Loops
It would be great if instead of this simple shadow we could fill in the gap
between the shadow and the text to create a solid 3D effect. We could achieve
this by drawing more pieces of text in the shadow_color at different offsets.
We’ll use a for loop to do this:
let SIZE=1280;720

func text3d(text, offset, shadow_color)
  for i in offset..0|-1
    !text text=text point=-i;i color=shadow_color
  !text text=text

!window size=SIZE
  !canvas
    !group font_size=100 translate=SIZE/2 color=1
      text3d("Hello world!", 10, 1;0;0)
    !text text="Figure 1:" point=100;100 color=1
A for loop iterates over a source vector given after the in keyword,
binding the value of each item to the name given between for and in, and
then evaluating the body of the loop. As with function definitions, the body is
indented.
We have made use of a range expression to provide the
source vector for this loop. Ranges specify a start value, a stop value, and
a step size. The stop value is not included in the vector. The | step value
is optional and taken as 1 if not given. The start value is also optional and
will be taken as 0 if not given. Thus, ..n is a quick way to get the values
0 to n-1. This range runs from offset towards 0, stepping by -1 each
time. With offset equal to 10, this gives the vector 10;9;8;7;6;5;4;3;2;1.
The for loop iterates across this vector, binding i to the next value on
each iteration. Loops evaluate to a vector composed from the result of each
evaluation of the loop body. The result of this loop is a 10-item vector of
!text nodes and these are then composed together with the following !text
node so that the function returns a vector of 11 nodes. These 11 nodes are then
appended to the group.
Note
Flitter is a strict functional programming language, and so ranges are
fully evaluated before use. For this reason, ranges must include a stop
value and the range ..1000000 will create a 1 million item long numeric
vector.
The only exception to strict evaluation is the usual short-circuit logical operations (see Operators in the language documentation).
Animation
While this code is starting to look more like a program, it still results in unchanging graphical output. In fact, Flitter is able to recognise that this program is entirely static and it will be compiled down to a single literal node tree – the function call is inlined and the loop unrolled.
Let’s introduce some animation. Animation in Flitter is achieved by writing
a program that introduces some visual change linked to time. The main way that
we incorporate time is with the use of the beat global name:
let SIZE=1280;720

func text3d(text, offset, shadow_color)
  for i in offset..0|-1
    !text text=text point=-i;i color=shadow_color
  !text text=text

!window size=SIZE
  !canvas
    !group font_size=100 translate=SIZE/2 color=1
      text3d("Hello world!", 10, hsv(beat/10;1;1))
    !text text="Figure 1:" point=100;100 color=1
beat provides a monotonically increasing value linked to the current program
tempo. The default tempo is 120bpm, or 2 beats per second. Here we are calling
the hsv() function with a 3-item vector of hue, saturation and value. Hue is
calculated by dividing the current beat counter by 10. At 120bpm it will take
5 seconds to cycle around the hue wheel.

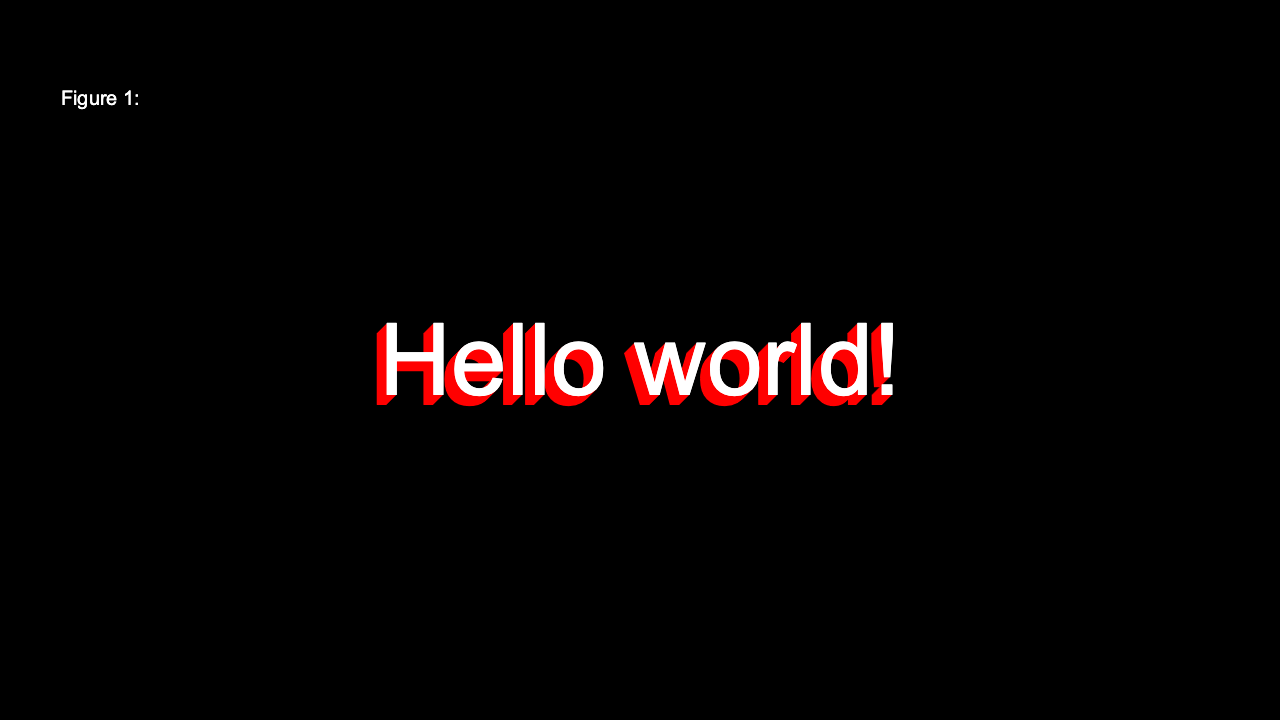
Let’s make our example a bit more trippy by animating the individual pieces of text that make up the 3D shadow:
let SIZE=1280;720

func text3d(text, offset, start_hue)
  for i in offset..0|-1
    !text text=text point=-i;i color=hsv(start_hue-i/offset;1;1)
  !text text=text

!window size=SIZE
  !canvas
    !group font_size=100 translate=SIZE/2 color=1
      text3d("Hello world!", 100, beat/10)
    !text text="Figure 1:" point=100;100 color=1
Now we are calling the hsv() function inside the loop for each text node,
using a starting hue passed in as an argument to the function and offsetting
this slightly for each iteration. The starting hue changes with the beat counter
so that we get a constantly moving spectrum shadow. We’ve increased the offset
to 100 so that the effect is more apparent.
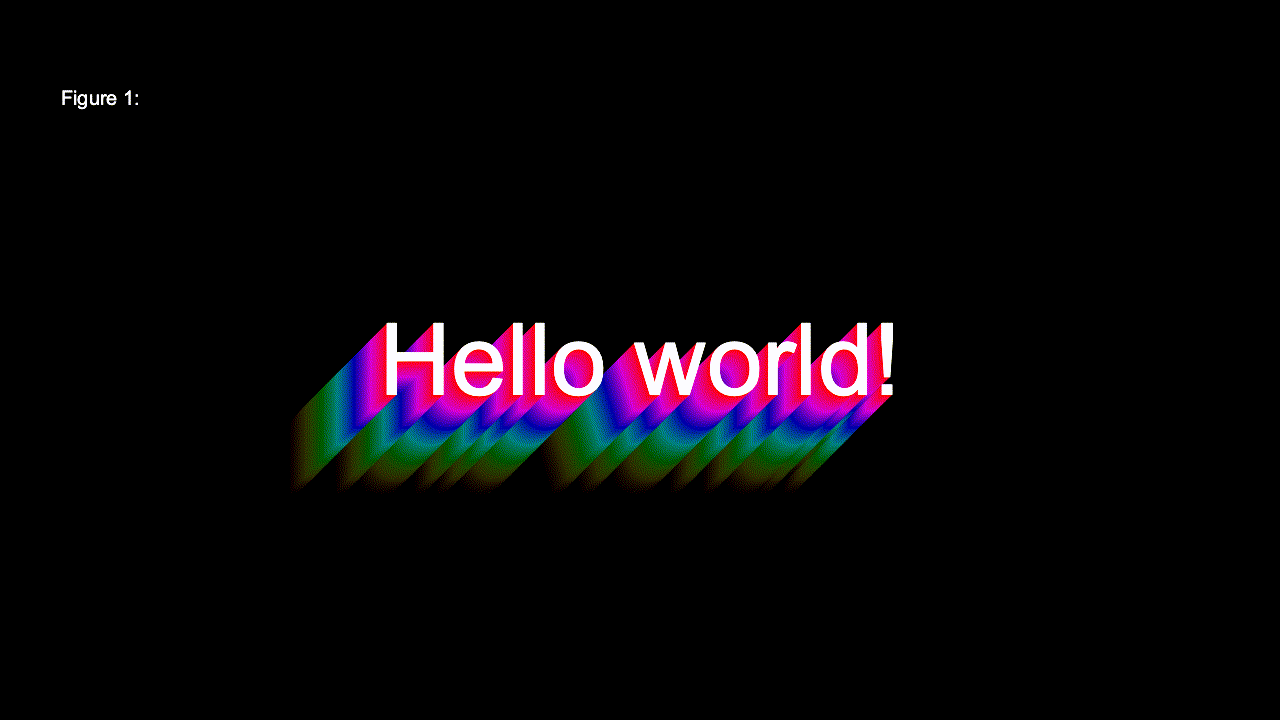
As a further flourish, let’s make the 3D shadow fade into the distance:
let SIZE=1280;720

func text3d(text, offset, start_hue)
  for i in offset..0|-1
    let k=i/offset
    !text text=text point=-i;i color=hsv(start_hue-k;1;1-k)
  !text text=text

!window size=SIZE
  !canvas
    !group font_size=100 translate=SIZE/2 color=1
      text3d("Hello world!", 100, beat/10)
    !text text="Figure 1:" point=100;100 color=1
Note that we’ve introduced a new name, k, inside the body of the for loop.
Names can be introduced with let in any expression sequence. The name will
only be bound within that sequence (and only for expressions following the
let). Therefore, outside of the loop the name k is not defined.
Template Functions
We are effectively using the text3d() function to define a new kind of
compound node. This is such a common pattern, that Flitter provides some
syntactic sugar to make the intention of the code easier to read:
let SIZE=1280;720

func text3d(_, text, offset, start_hue)
  for i in offset..0|-1
    let k=i/offset
    !text text=text point=-i;i color=hsv(start_hue-k;1;1-k)
  !text text=text

!window size=SIZE
  !canvas
    !group font_size=100 translate=SIZE/2 color=1
      @text3d text="Hello world!" offset=100 start_hue=beat/10
    !text text="Figure 1:" point=100;100 color=1
The @ character introduces a template function
call. It is followed by the name of the
function and then a number of named arguments, using the same convention as node
attributes.
Note that we’ve added a new initial parameter to the text3d() function
definition. If a template function call has an indented sequence of expressions,
then the result vector from evaluating those expressions is passed in as the
first argument. This allows a template function call to be provided with “child”
nodes that it can manipulate and return – often they are appended as children to
whatever node or nodes the function creates. In this case, we do not expect any
such nodes and will ignore any that exist so, by convention, we name this
parameter _ to indicate that it is unused.
The result is a normal function call, but the idea that we mean this to be a new kind of user-defined node is made clearer. In fact, we can also provide default values to the parameters in the function definition and this allows us to skip arguments in the call:
let SIZE=1280;720

func text3d(_, text, offset=100, start_hue=0)
  for i in offset..0|-1
    let k=i/offset
    !text text=text point=-i;i color=hsv(start_hue-k;1;1-k)
  !text text=text

!window size=SIZE
  !canvas
    !group font_size=100 translate=SIZE/2 color=1
      @text3d text="Hello world!" start_hue=beat/10
    !text text="Figure 1:" point=100;100 color=1
The named arguments can be given in any order. Any function parameters that
lack a default value and that are not specified as arguments will be given the
special value null, which is the empty vector.
If Expressions
This new version of text3d() is great, but we can no longer specify a simple
colored shadow. We can make the code switch between different pieces of
behaviour with an if expression:
let SIZE=1280;720

func text3d(_, text, offset=100, start_hue, shadow_color)
  for i in offset..0|-1
    let k=i/offset
    if start_hue != null
      !text text=text point=-i;i color=hsv(start_hue-k;1;1-k)
    else
      !text text=text point=-i;i color=shadow_color*(1-k)
  !text text=text

!window size=SIZE
  !canvas
    !group font_size=100 translate=SIZE/2 color=1
      @text3d text="Hello world!" shadow_color=1;0;0 -- start_hue=beat/10
    !text text="Figure 1:" point=100;100 color=1
Here we’ve removed the default value from start_hue and added back in a
shadow_color parameter again. Inside the loop we test whether start_hue is
the null vector, which would indicate that it has not been supplied as an
argument, and draw the shadow text using shadow_color instead. We retain
the fading behaviour by multiplying this color by 1-k so that it fades to
black. As colors are just numerical vectors, we can use normal mathematical
operations on them.
We’ve added a shadow_color argument in the template function call and also
put -- in front of the previous start_hue argument. This begins a comment
block that extends to the end of the line. Thus, putting -- in front of any
code will cause the parser to ignore it.
Summary
This tutorial has introduced most of the important features of programming with
Flitter. The remaining language features are documented in the language
documentation. It is important to remember that the language
itself does not render any output and that expressions like !text are not
instructions to draw text, but node expressions to be gathered up into a tree
that is then passed to the rendering framework. Individual renderers will treat
these nodes in different ways.